

Testando SweetFX
+7
djadilsonoliveira37
danielsantana
Zanolli
Fabio_Rj
Douglas.Matos
Jonathan_Bauru
ls_miguel
11 participantes
Página 1 de 1

 Testando SweetFX
por ls_miguel Seg 26 Ago 2013, 20:25
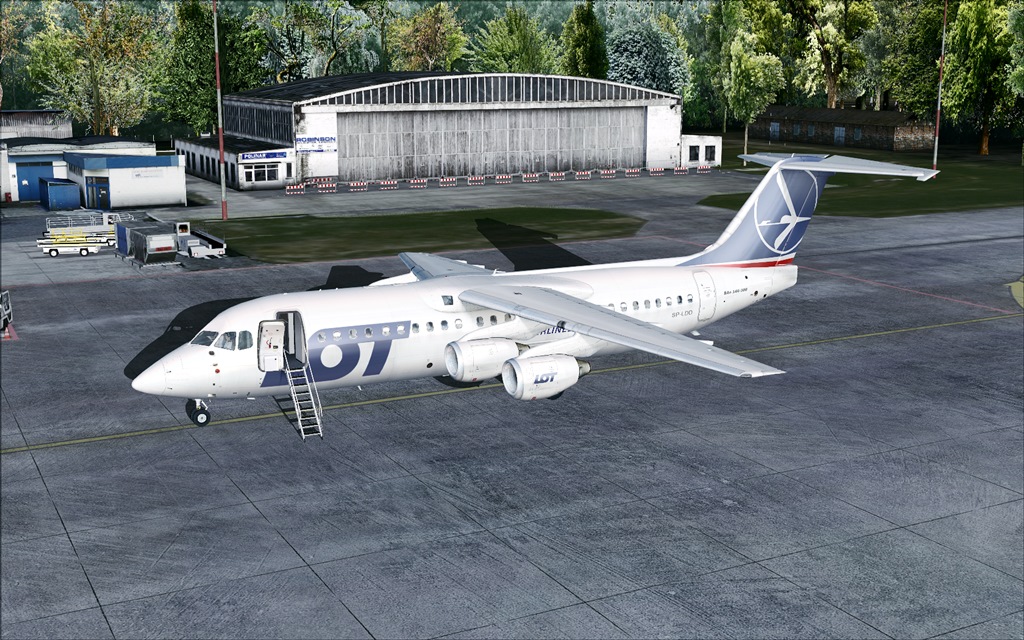
Primeiramente, gostaria de parabenizar o Ultra por sempre nos ajudar a refinar os simuladores. 
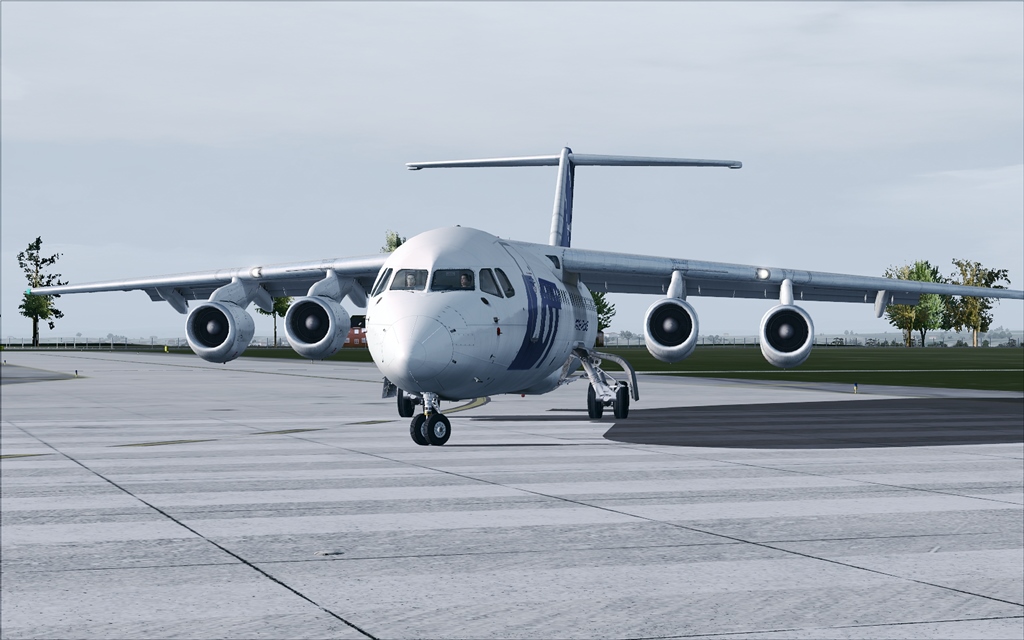
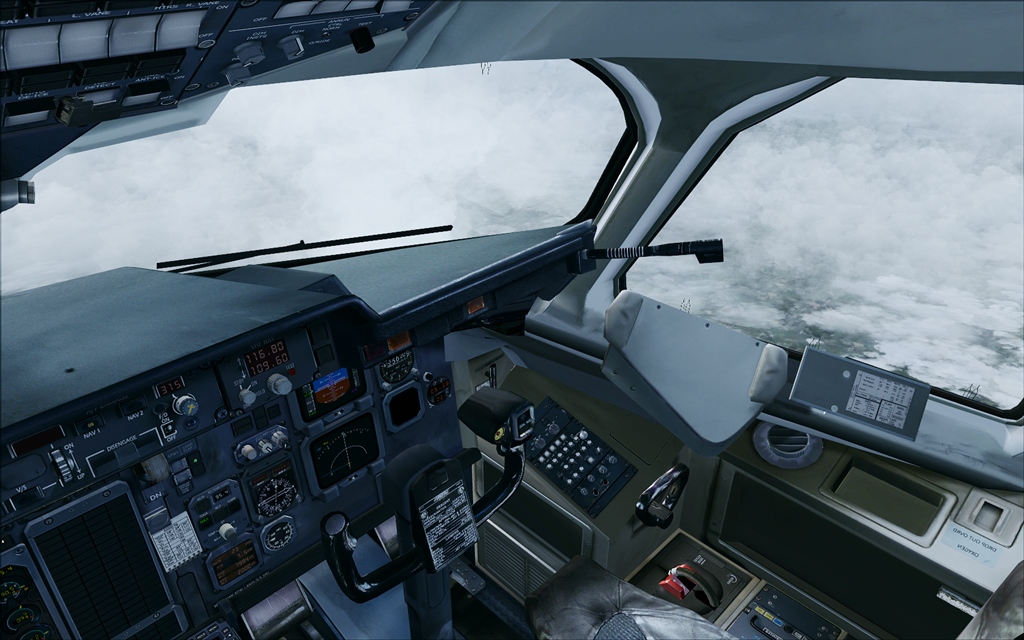
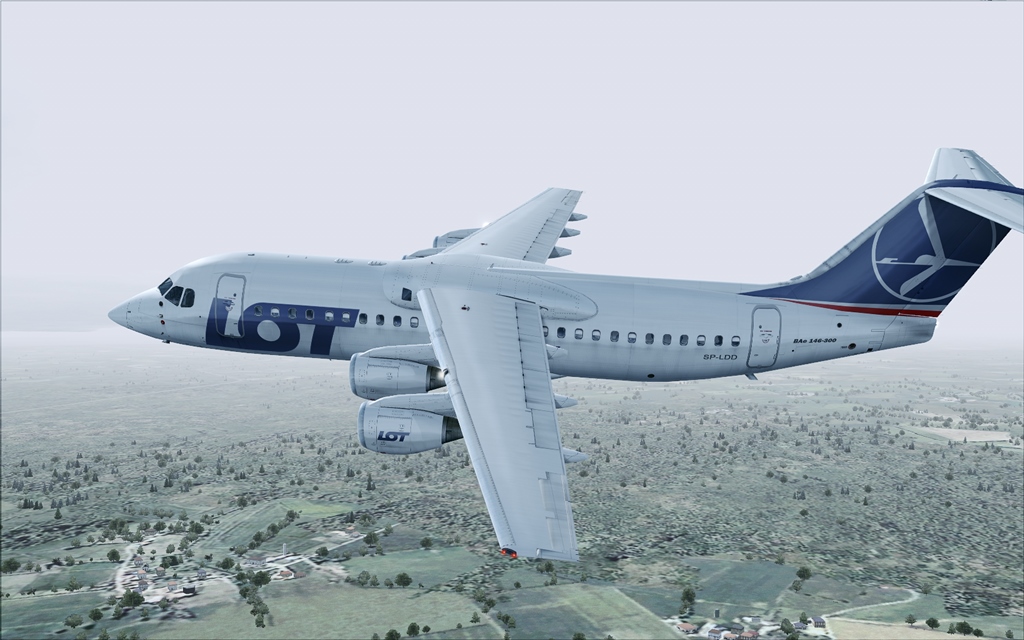
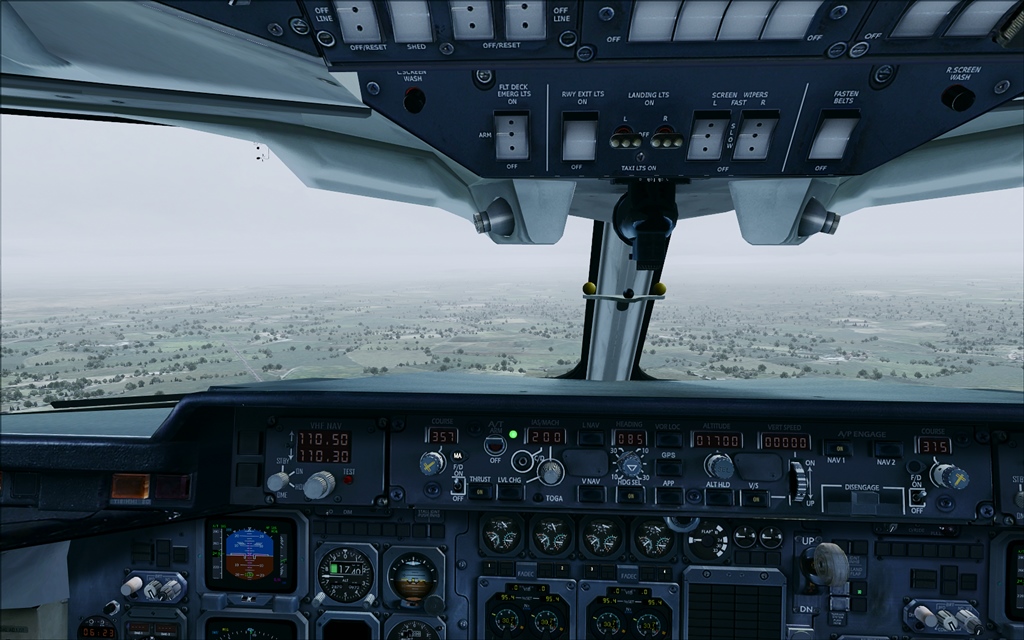
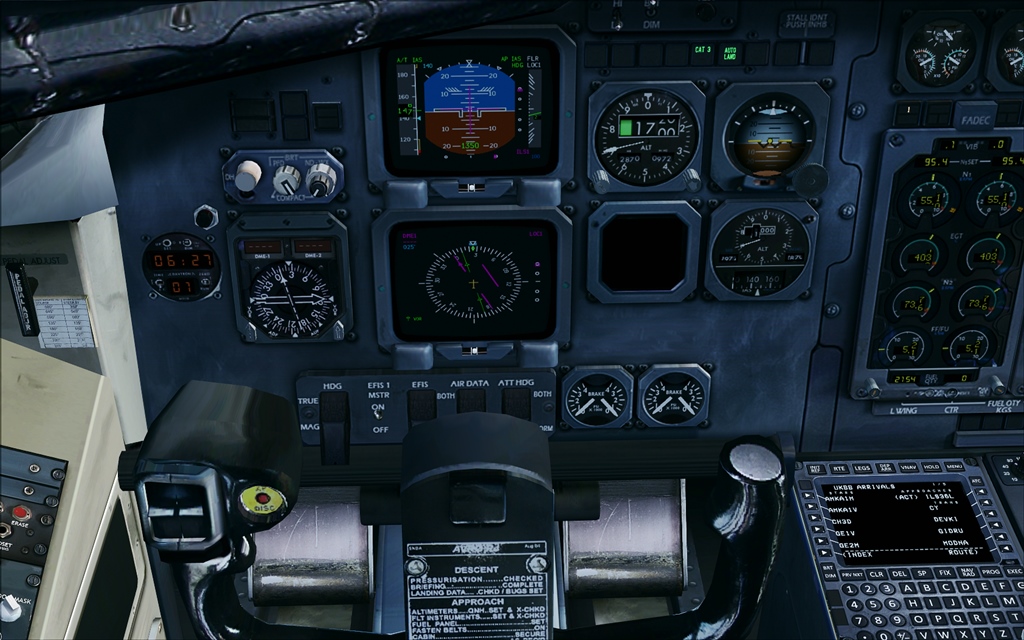
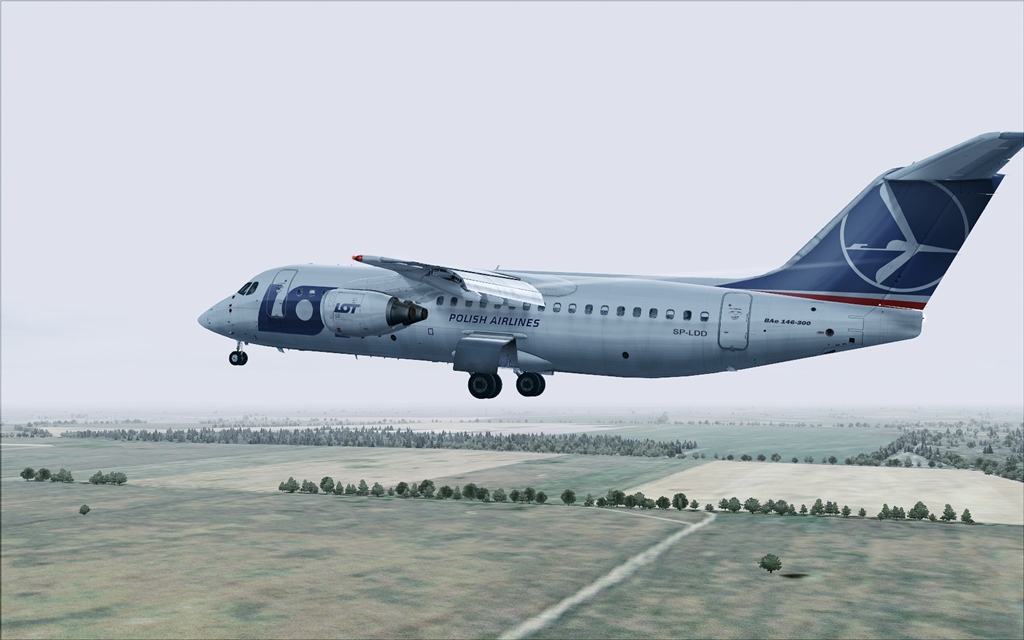
Segue uma sequência de screens com o preset do Ultra. A principio, estranhei bastante pois o mesmo, deixa o simulador mais claro durante o dia. Porem, como diz o tópico, é apenas um teste. Vou experimentar outros presets antes de decidir se vou de fato abandonar o ENB . De qualque maneira, uma coisa fica bem evidente: a definição é melhor. Sem mais, abraços e boa noite a todos.
1
2
3
4
5
6
7

8

9

10
11

12
13
14

15

16

17
18
19

20
21
22
23

24

25
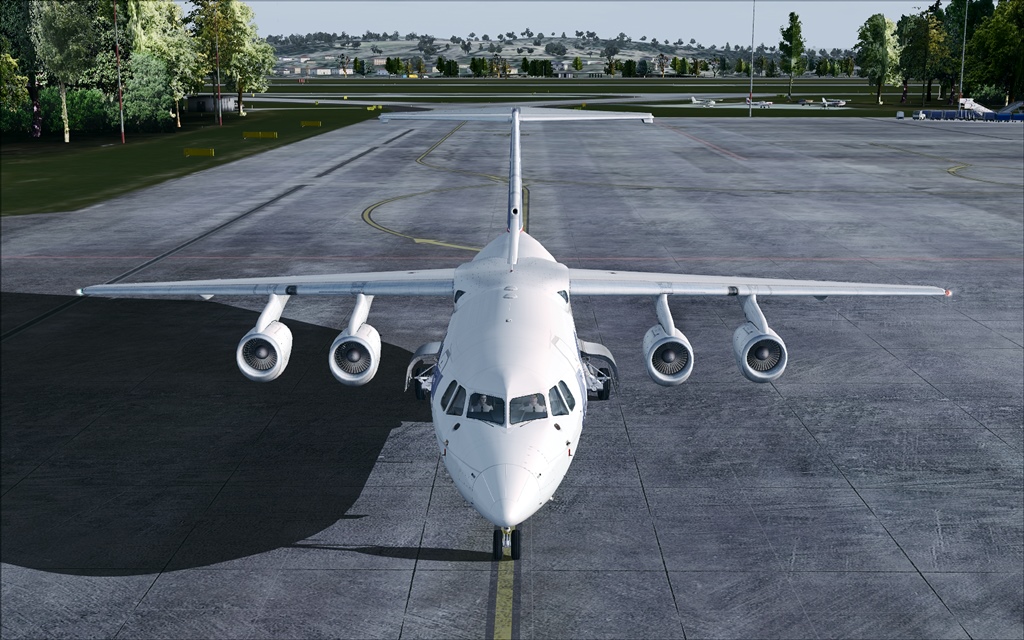
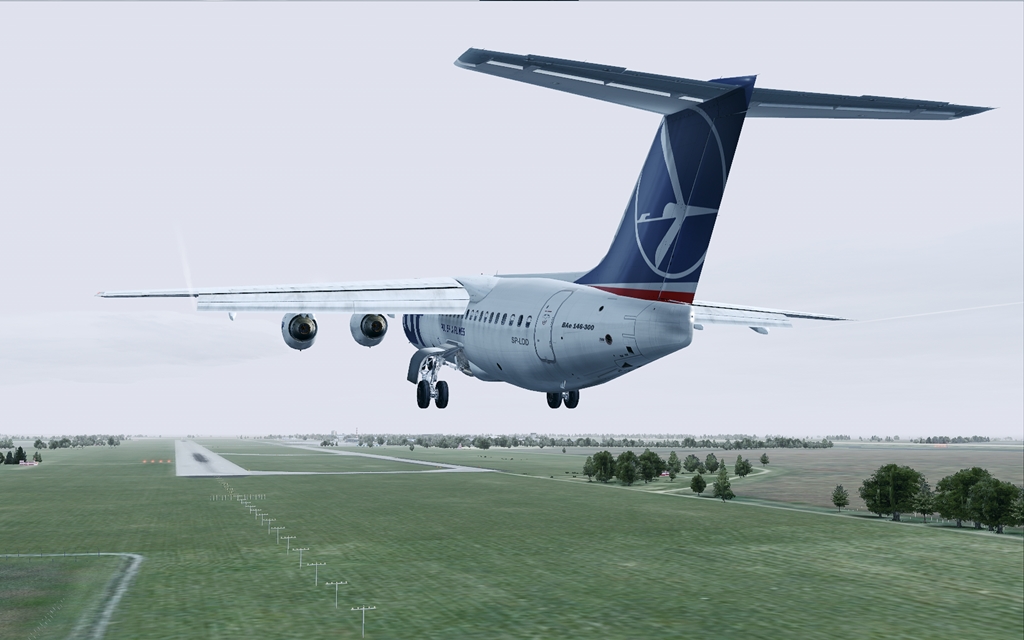
Segue uma sequência de screens com o preset do Ultra. A principio, estranhei bastante pois o mesmo, deixa o simulador mais claro durante o dia. Porem, como diz o tópico, é apenas um teste. Vou experimentar outros presets antes de decidir se vou de fato abandonar o ENB
. De qualque maneira, uma coisa fica bem evidente: a definição é melhor. Sem mais, abraços e boa noite a todos.1

2

3

4

5

6

7

8

9

10

11

12

13

14

15

16

17

18

19

20

21

22

23

24

25

_________________
Win 10 | X-plane 11, MFS2020 | Intel Core i5 6600 @3,9GHz Turbo | 16GB DDR4 | ASUS RX580 OC 8GB

ls_miguel- Brigadeiro

-

Inscrito em : 05/07/2011
Mensagens : 2269
Reputação : 151
Idade : 42
Simulador preferido : X-plane 11
Nacionalidade :
-


Re: Testando SweetFX
por Jonathan_Bauru Seg 26 Ago 2013, 20:38
Bonito pra caramba as screens, está bastante realístico. 
_________________
Gigabyte A320M-S2H, Ryzen 5 3600 3.6Ghz, Memória Corsair Vengeance 2x8GB DDR4 2400mhz, PCyes GTX 1660 DUAL OC 6GB, Fonte Aerocool Kcas 500W 80 Plus Bronze, Monitor LED Full HD Samsung 21,5'' S22B300.

Jonathan_Bauru- Coronel

-
Inscrito em : 28/02/2011
Mensagens : 1368
Reputação : 203
Idade : 26
Simulador preferido : MSFS
Emprego/lazer : FSTexturas
Nacionalidade : -
Re: Testando SweetFX
por Douglas.Matos Seg 26 Ago 2013, 21:17
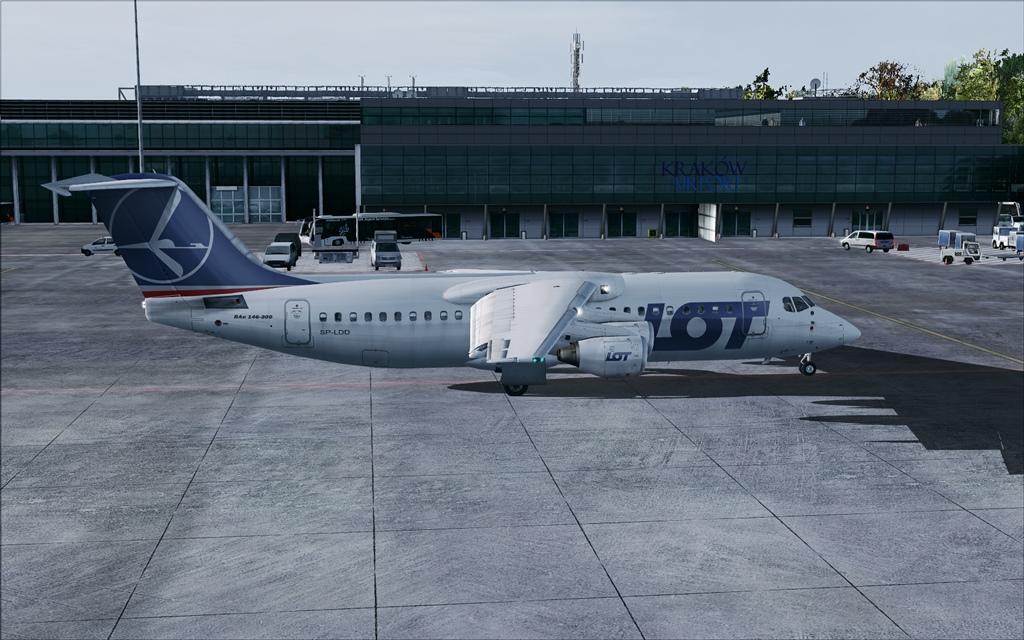
A 3 e a 7 são reais nem vem  perfeitas comando
perfeitas comando
Douglas.Matos- Major-Brigadeiro

-
Inscrito em : 17/01/2013
Mensagens : 3102
Reputação : 167
Idade : 28
Simulador preferido : Fsx-SE
Emprego/lazer : Auxiliar Administrativo / Financeiro / Suporte e Manutenção Hardware
Nacionalidade :
Re: Testando SweetFX
por ls_miguel Ter 27 Ago 2013, 16:26
Gostaria de saber dos colegas se esse perfil com intensidade menor de cores fica mais realístico ao ENB que costumo usar (só verificar meus posts anteriores) 
_________________
Win 10 | X-plane 11, MFS2020 | Intel Core i5 6600 @3,9GHz Turbo | 16GB DDR4 | ASUS RX580 OC 8GB
ls_miguel- Brigadeiro
-
Inscrito em : 05/07/2011
Mensagens : 2269
Reputação : 151
Idade : 42
Simulador preferido : X-plane 11
Nacionalidade : -
Re: Testando SweetFX
por Fabio_Rj Ter 27 Ago 2013, 16:39
isso é um FS2004 ?

_________________
| i72600k @ 4.6_1.3V | H100i | GigaByte GTX980 Flex | Corsair Veng 4x8gb DDR3 1600 @ 2000 | Gigabyte GA-Z68X-UD7-B3 | 7Team V-FORCE 850W | SSD 250 + 3TB Sata 6| A4TECH X7 F3 | A4TECH G800V X7 | Corsair 600T | Saitek X52 | 4K LED LG 49 49UB8200
Frase irritante "Aproveitando o tópico" ... por acaso não sabem abrir novo tópico, que ajudará na busca ?
Fabio Leal
Nada comento, só observo.

Fabio_Rj- Banido
-
Inscrito em : 23/12/2009
Mensagens : 1387
Reputação : 95
Idade : 48
Simulador preferido : P3D V2.4 ......
Emprego/lazer : Infraero PSA
Nacionalidade : -
Re: Testando SweetFX
por Douglas.Matos Ter 27 Ago 2013, 22:53
Eu achei este pelo menos muito mais real, ta lindo
Douglas.Matos- Major-Brigadeiro
-
Inscrito em : 17/01/2013
Mensagens : 3102
Reputação : 167
Idade : 28
Simulador preferido : Fsx-SE
Emprego/lazer : Auxiliar Administrativo / Financeiro / Suporte e Manutenção Hardware
Nacionalidade :
Re: Testando SweetFX
por Zanolli Qua 28 Ago 2013, 09:54
digo o mesmoFabio_Rj escreveu:isso é um FS2004 ?

parabéns !

Zanolli- Coronel
-
Inscrito em : 30/07/2012
Mensagens : 1275
Reputação : 240
Idade : 70
Simulador preferido : P3D MSFS
Nacionalidade :
Re: Testando SweetFX
por danielsantana Qua 28 Ago 2013, 12:52
Que show einh! Pra mim essa configuração ta perfeita.
_________________
CPU: I5 8400.
Memoria Ram: 16GB DDR4 2666mhz.
PV: GTX 1660 6GB.
Fonte: Corsair 500w.

danielsantana- Tenente-Coronel

-
Inscrito em : 26/03/2012
Mensagens : 912
Reputação : 75
Idade : 37
Simulador preferido : FS 2020
Emprego/lazer : Desenvolvedor
Nacionalidade :
Re: Testando SweetFX
por ls_miguel Sex 30 Ago 2013, 09:19
Estou testando um novo preset com algumas configurações que eu editei. Caso alguém queira testar, serve para FS2004 e FSX obviamente . Em breve, posto os resultados.Segue abaixo:
- Código:
  /*-----------------------------------------------------------.
 /                       Description                           /
  '------------------------------------------------------------/

Game: Any
SweetFX version: 1.4
Author: CeeJay.dk
Description: Edited by Miguel

These are the default settings for SweetFX 1.4
They smoothen jagged edges with SMAA anti-aliasing, sharpen the image with LumaSharpen and make the colors slightly more vibrant with Vibrance.

Please note when tweaking settings that higher numbers does not always equal better (nor does lower).
Finding the best settings for your game and your taste is about finding just the right amount to apply.

If you made a good setttings preset please share it with your friends, on forums and websites,
and/or submit it to the SweetFX Settings Database : http://sfx.thelazy.net/games/

   /*-----------------------------------------------------------.
  /                      Choose effects                         /
  '-----------------------------------------------------------*/

// Set to 1 for ON or 0 for OFF
#define USE_SMAA_ANTIALIASING  0            // [0 or 1] SMAA Anti-aliasing : Smoothens jagged lines using the SMAA technique.
#define USE_FXAA_ANTIALIASING  0            // [0 or 1] FXAA Anti-aliasing : Smoothens jagged lines using the FXAA technique. WIP - Currently only works in DX9 and you need to use the FXAA injector dlls.
#define USE_CARTOON            0            // [0 or 1] Cartoon : "Toon"s the image. (Interferes with SMAA, CRT, Bloom, HDR and Lumasharpen)
#define USE_ADVANCED_CRT       0            // [0 or 1] Advanced CRT : Simulates an old CRT TV display. (Interferes with SMAA, Cartoon, Bloom, HDR and Lumasharpen, and it has a very high performance cost)
#define USE_BLOOM              0            // [0 or 1] Bloom : Makes bright lights bleed their light into their surroundings (relatively high performance cost)
#define USE_HDR                0            // [0 or 1] HDR : Not actual HDR - It just tries to mimic an HDR look (relatively high performance cost)
#define USE_LUMASHARPEN        0            // [0 or 1] LumaSharpen : Also sharpens the antialiased edges which makes them less smooth - I'm working on fixing that.
#define USE_TECHNICOLOR        0            // [0 or 1] TECHNICOLOR : Attempts to mimic the look of an old movie using the Technicolor three-strip color process (Techicolor Process 4)
#define USE_DPX                0            // [0 or 1] Cineon DPX : Should make the image look like it's been converted to DXP Cineon - basically it's another movie-like look similar to technicolor.
#define USE_MONOCHROME         0            // [0 or 1] Monochrome : Monochrome makes the colors disappear.
#define USE_LIFTGAMMAGAIN      0            // [0 or 1] Lift Gamma Gain : Adjust brightness and color of shadows, midtones and highlights (avoids clipping)
#define USE_TONEMAP            0            // [0 or 1] Tonemap : Adjust gamma, exposure, saturation, bleach and defog. (may cause clipping)
#define USE_VIBRANCE           0            // [0 or 1] Vibrance : Intelligently saturates (or desaturates if you use negative values) the pixels depending on their original saturation.
#define USE_CURVES             1            // [0 or 1] Curves : Contrast adjustments using S-curves.
#define USE_SEPIA              0            // [0 or 1] Sepia : Sepia tones the image.
#define USE_VIGNETTE           0            // [0 or 1] Vignette : Darkens the edges of the image to make it look more like it was shot with a camera lens. May cause banding artifacts.
#define USE_DITHER             0            // [0 or 1] Dither : Applies dithering to simulate more colors than your monitor can display. This lessens banding artifacts (mostly caused by Vignette)
#define USE_BORDER             0            // [0 or 1] Border : Makes the screenedge black as a workaround for the bright edge that forcing some AA modes sometimes causes.
#define USE_SPLITSCREEN        0            // [0 or 1] Splitscreen : Enables the before-and-after splitscreen comparison mode.


   /*-----------------------------------------------------------.
  /                  SMAA Anti-aliasing settings                /
  '-----------------------------------------------------------*/

#define SMAA_THRESHOLD         0.10         // [0.05 to 0.20] Edge detection threshold. If SMAA misses some edges try lowering this slightly. I prefer between 0.08 and 0.12.
#define SMAA_MAX_SEARCH_STEPS  16           // [0 to 98] Determines the radius SMAA will search for aliased edges
#define SMAA_MAX_SEARCH_STEPS_DIAG 6            // [0 to 16] Determines the radius SMAA will search for diagonal aliased edges
#define SMAA_CORNER_ROUNDING   0            // [0 to 100] Determines the percent of antialiasing to apply to corners. 0 seems to affect fine text the least so it's the default.

// -- Advanced SMAA settings --
#define COLOR_EDGE_DETECTION   1            // [0 or 1] 1 Enables color edge detection (slower but slightly more acurate) - 0 uses luma edge detection (faster)
#define SMAA_DIRECTX9_LINEAR_BLEND 0            // [0 or 1] Using DX9 HARDWARE? (software version doesn't matter) if so this needs to be 1 - If not, leave it at 0.
                                      //Enable this only if you use a Geforce 7xxx series or older card, or a Radeon X1xxx series or older card.

   /*-----------------------------------------------------------.
  /                  FXAA Anti-aliasing settings                /
  '-----------------------------------------------------------*/
#define FXAA_QUALITY__PRESET   9            // [1 to 9] Choose the quality preset. 9 is the highest quality.
#define fxaa_Subpix            0.400        // [0.000 to 1.000] Choose the amount of sub-pixel aliasing removal.
#define fxaa_EdgeThreshold     0.250        // [0.000 to 1.000] Edge detection threshold. The minimum amount of local contrast required to apply algorithm.
#define fxaa_EdgeThresholdMin  0.060        // [0.000 to 1.000] Darkness threshold. Trims the algorithm from processing darks.


   /*-----------------------------------------------------------.
  /                      Cartoon settings                       /
  '-----------------------------------------------------------*/
#define CartoonPower           1.0          // [0.1 to 10.0] Amount of effect you want.


   /*-----------------------------------------------------------.
  /                    Advanced CRT settings                   /
  '----------------------------------------------------------*/
#define CRTAmount              1.00         // [0.00 to 1.00] Amount of CRT effect you want

#define CRTResolution          1.2          // [1.0 to 8.O] Input size coefficent (low values gives the "low-res retro look"). Default is 1.2
#define CRTgamma               2.4          // [0.0 to 4.0] Gamma of simulated CRT (default 2.4)
#define CRTmonitorgamma        2.2          // [0.0 to 4.0] Gamma of display monitor (typically 2.2 is correct)
#define CRTBrightness          1.0          // [1.0 to 3.0] Used to boost brightness a little. Default is 1.0
#define CRTScanlineIntensity   2.0          // [2.0 to 4.0] Scanlines intensity (use integer values preferably). Default is 2.0
#define CRTScanlineGaussian    1            // [0 or 1] Use the "new nongaussian scanlines bloom effect". Default is on

#define CRTCurvature           1            // [[0 or 1] "Barrel effect" enabled (1) or off (0)
#define CRTCurvatureRadius     1.5          // [0.0 to 2.0] Curvature Radius (only effective when Curvature is enabled). Default is 1.5
#define CRTCornerSize          0.0010       // [0.0000 to 0.0020] Higher values, more rounded corner. Default is 0.001
#define CRTDistance            2.00         // [0.00 to 4.00] Simulated distance from viewer to monitor. Default is 2.00
#define CRTAngleX              0.00         // [-0.20 to 0.20] Tilt angle in radians (X coordinates)
#define CRTAngleY              -0.10        // [-0.20 to 0.20] Tilt angle in radians (Y coordinates). (Value of -0.15 gives the 'arcade tilt' look)
#define CRTOverScan            1.01         // [1.00 to 1.10] Overscan (e.g. 1.02 for 2% overscan). Default is 1.01
#define CRTOversample          0            // [0 or 1] Enable 3x oversampling of the beam profile (warning : performance hit)

   /*-----------------------------------------------------------.
  /                       Bloom settings                        /
  '-----------------------------------------------------------*/
#define BloomThreshold         20.25        // [0.00 to 50.00] Threshold for what is a bright light (that causes bloom) and what isn't.
#define BloomPower             1.446        // [0.000 to 8.000] Strength of the bloom
#define BloomWidth             0.0142       // [0.0000 to 1.0000] Width of the bloom


   /*-----------------------------------------------------------.
  /                        HDR settings                         /
  '-----------------------------------------------------------*/
#define HDRPower               1.30         // [0.00 to 8.00] Strangely lowering this makes the image brighter
#define radius2                0.87         // [0.00 to 8.00] Raising this seems to make the effect stronger and also brighter

   /*-----------------------------------------------------------.
  /                     LumaSharpen settings                    /
  '-----------------------------------------------------------*/
// -- Sharpening --
#define sharp_strength         0.60         // [0.10 to 3.00] Strength of the sharpening
#define sharp_clamp            0.035        // [0.000 to 1.000] Limits maximum amount of sharpening a pixel recieves - Default is 0.035

// -- Advanced sharpening settings --
#define pattern                2            // [1|2|3|4] Choose a sample pattern. 1 = Fast, 2 = Normal, 3 = Wider, 4 = Pyramid shaped.
#define offset_bias            1.0          // [0.0 to 6.0] Offset bias adjusts the radius of the sampling pattern.
                         //I designed the pattern for offset_bias 1.0, but feel free to experiment.

// -- Debug sharpening settings --
#define show_sharpen           0            // [0 or 1] Visualize the strength of the sharpen (multiplied by 4 to see it better)


   /*-----------------------------------------------------------.
  /                      TECHNICOLOR settings                   /
  '-----------------------------------------------------------*/
#define TechniAmount           0.4          // [0.00 to 1.00]
#define TechniPower            4.0          // [0.00 to 8.00]
#define redNegativeAmount      0.88         // [0.00 to 1.00]
#define greenNegativeAmount    0.88         // [0.00 to 1.00]
#define blueNegativeAmount     0.88         // [0.00 to 1.00]


  /*-----------------------------------------------------------.
  /                      Cineon DPX settings                    /
  '-----------------------------------------------------------*/
#define Red                    8.0          // [1.0 to 15.0]
#define Green                  8.0          // [1.0 to 15.0]
#define Blue                   8.0          // [1.0 to 15.0]

#define ColorGamma             2.5          // [0.1 to 2.5] Adjusts the colorfulness of the effect in a manner similar to Vibrance. 1.0 is neutral.
#define DPXSaturation          3.0          // [0.0 to 8.0] Adjust saturation of the effect. 1.0 is neutral.

#define RedC                   0.36         // [0.60 to 0.20]
#define GreenC                 0.36         // [0.60 to 0.20]
#define BlueC                  0.34         // [0.60 to 0.20]

#define Blend                  0.2          // [0.00 to 1.00] How strong the effect should be.


   /*-----------------------------------------------------------.
  /                      Monochrome settings                    /
  '-----------------------------------------------------------*/
#define Monochrome_conversion_values float3(0.18,0.41,0.41) // [0.00 to 1.00] Percentage of RGB to include (should sum up to 1.00)


   /*-----------------------------------------------------------.
  /                      Lift Gamma Gain settings               /
  '-----------------------------------------------------------*/
#define RGB_Lift               float3(1.000, 1.000, 1.000) // [0.000 to 2.000] Adjust shadows for Red, Green and Blue
#define RGB_Gamma              float3(1.000, 1.000, 1.000) // [0.000 to 2.000] Adjust midtones for Red, Green and Blue
#define RGB_Gain               float3(1.000, 1.000, 1.000) // [0.000 to 2.000] Adjust highlights for Red, Green and Blue


   /*-----------------------------------------------------------.
  /                        Tonemap settings                     /
  '-----------------------------------------------------------*/
#define Gamma                  1.0          // [0.000 to 2.000] Adjust midtones

#define Exposure               0.00         // [-1.000 to 1.000] Adjust exposure

#define Saturation             0.00         // [-1.000 to 1.000] Adjust saturation

#define Bleach                 0.00         // [0.000 to 1.000] Brightens the shadows and fades the colors

#define Defog                  0.000        // [0.000 to 1.000] How much of the color tint to remove
#define FogColor               float3(0.00, 0.00, 2.55) // [0.00 to 2.55, 0.00 to 2.55, 0.00 to 2.55] What color to remove - default is blue


   /*-----------------------------------------------------------.
  /                       Vibrance settings                     /
  '-----------------------------------------------------------*/
#define Vibrance               0.15         // [-1.00 to 1.00] Intelligently saturates (or desaturates if you use negative values) the pixels depending on their original saturation.


   /*-----------------------------------------------------------.
  /                        Curves settings                      /
  '-----------------------------------------------------------*/
#define Curves_mode            2            // [0|1|2] Choose what to apply contrast to. 0 = Luma, 1 = Chroma, 2 = both Luma and Chroma. Default is 0 (Luma)
#define Curves_contrast        0.9          // [-1.00 to 1.00] The amount of contrast you want

// -- Advanced curve settings --
#define Curves_formula         1            // [1|2|3|4|5|6|7|8|9] The contrast s-curve you want to use.
                             //1 = Sine, 2 = Abs split, 3 = Smoothstep, 4 = Exp formula, 5 = Simplified Catmull-Rom (0,0,1,1), 6 = Perlins Smootherstep
                             //7 = Abs add, 8 = Techicolor Cinestyle, 9 = Parabola.
                             //Note that Technicolor Cinestyle is practically identical to Sine, but runs slower. In fact I think the difference might only be due to rounding errors.
                             //I prefer 2 myself, but 3 is a nice alternative with a little more effect (but harsher on the highlight and shadows) and it's the fastest formula.

  /*-----------------------------------------------------------.
  /                         Sepia settings                      /
  '-----------------------------------------------------------*/
#define ColorTone              float3(1.40, 1.10, 0.90) // [0.00 to 2.55, 0.00 to 2.55, 0.00 to 2.55] What color to tint the image
#define GreyPower              0.11         // [0.00 to 1.00] How much desaturate the image before tinting it
#define SepiaPower             0.58         // [0.00 to 1.00] How much to tint the image


   /*-----------------------------------------------------------.
  /                       Vignette settings                     /
  '-----------------------------------------------------------*/
#define VignetteRatio          1.00         // [0.15 to 6.00] Sets a width to height ratio. 1.00 (1/1) is perfectly round, while 1.60 (16/10) is 60 % wider than it's high.
#define VignetteRadius         1.00         // [-1.00 to 3.00] lower values = stronger radial effect from center
#define VignetteAmount         -1.00        // [-2.00 to 1.00] Strength of black. -2.00 = Max Black, 1.00 = Max White.
#define VignetteSlope          8            // [1 to 16] How far away from the center the change should start to really grow strong (odd numbers cause a larger fps drop than even numbers)
#define VignetteCenter         float2(0.500, 0.500) // [0.000 to 1.000, 0.000 to 1.000] Center of effect.


   /*-----------------------------------------------------------.
  /                        Dither settings                      /
  '-----------------------------------------------------------*/
#define dither_method          1            // [1 or 2] 1 = Ordering dithering (good and very fast), 2 = Random dithering (even better dithering but not as fast)

//Note that the patterns used by Dither, makes an image harder to compress.
//This can make your screenshots and video recordings take up more space.


   /*-----------------------------------------------------------.
  /                        Border settings                      /
  '-----------------------------------------------------------*/
//No settings yet, beyond switching it on or off in the top section.


   /*-----------------------------------------------------------.
  /                     Splitscreen settings                    /
  '-----------------------------------------------------------*/
#define splitscreen_mode       1            // [1|2|3|4|5] 1 = Vertical 50/50 split, 2 = Vertical 25/50/25 split, 3 = Vertical 50/50 angled split, 4 = Horizontal 50/50 split, 5 = Horizontal 25/50/25 split
_________________
Win 10 | X-plane 11, MFS2020 | Intel Core i5 6600 @3,9GHz Turbo | 16GB DDR4 | ASUS RX580 OC 8GB
ls_miguel- Brigadeiro
-
Inscrito em : 05/07/2011
Mensagens : 2269
Reputação : 151
Idade : 42
Simulador preferido : X-plane 11
Nacionalidade : -
Re: Testando SweetFX
por djadilsonoliveira37 Ter 03 Set 2013, 19:55
Apesar de andar sumido, não poderia deixar de comentar: SHOW!

djadilsonoliveira37- Coronel
-
Inscrito em : 25/03/2012
Mensagens : 1325
Reputação : 20
Idade : 50
Simulador preferido : Fs2004
Emprego/lazer : Dj
Nacionalidade :
Re: Testando SweetFX
por ls_miguel Qua 04 Set 2013, 10:50
Realmente. Anda sumido. Volta a postar seus voos colegadjadilsonoliveira37 escreveu:Apesar de andar sumido, não poderia deixar de comentar: SHOW!
 . Abraços.
 _________________
Win 10 | X-plane 11, MFS2020 | Intel Core i5 6600 @3,9GHz Turbo | 16GB DDR4 | ASUS RX580 OC 8GB
ls_miguel- Brigadeiro
-
Inscrito em : 05/07/2011
Mensagens : 2269
Reputação : 151
Idade : 42
Simulador preferido : X-plane 11
Nacionalidade : -
Re: Testando SweetFX
por Davidro Sáb 08 Fev 2014, 01:07
Você pode por favor me diga o tema REX você está usando nessas fotos?
Você está usando enbseries ou apenas sweetfx?
Desculpe pelo meu mau português!
xD
Você está usando enbseries ou apenas sweetfx?
Desculpe pelo meu mau português!
xD
Davidro- Recruta

-
Inscrito em : 25/01/2014
Mensagens : 1
Reputação : 0
Idade : 27
Nacionalidade :
Re: Testando SweetFX
por BeriloJr Sáb 08 Fev 2014, 02:09
Você errou o simulador...isso é o X  ... nossa tá D+ parabéns....
... nossa tá D+ parabéns....
BeriloJr- Capitão

-
Inscrito em : 28/03/2011
Mensagens : 216
Reputação : 23
Idade : 45
Nacionalidade :
Re: Testando SweetFX
por João Pedro Sáb 08 Fev 2014, 15:59
Show Miguel! Parabéns, está fantástico
_________________
João Pedro Duarte
Conheça o Mach, ferramenta para planejamento online de voo totalmente gratuita: https://jpedroh.github.io/mach/

João Pedro- Brigadeiro
-
Inscrito em : 30/11/2011
Mensagens : 2751
Reputação : 229
Idade : 23
Simulador preferido : P3D
Emprego/lazer : Estudante
Nacionalidade :
Re: Testando SweetFX
por Rabbers Sáb 08 Fev 2014, 16:13
Já testei o ENB, mas os frames caíam drasticamente quando estava habilitado, como ficam os frames com o SweetFX?
EDIT: A, as shots ficaram fantásticas!
EDIT: A, as shots ficaram fantásticas!
_________________
Ryzen5 3600 // 16Gb PC3200 // GTX 1660 Super

Rabbers- Capitão
-
Inscrito em : 13/05/2008
Mensagens : 111
Reputação : 1
Idade : 56
Simulador preferido : FS2020
Emprego/lazer : Smet Group
Nacionalidade :

 Tópicos semelhantes
» Testando o SweetFx junto com a Seleção!
» SweetFX Mix
» P3D + SweetFX ou ENB
» Teste depois de configurado o fsx.CFG.
» Ajustando o SweetFX com ENB
» SweetFX Mix
» P3D + SweetFX ou ENB
» Teste depois de configurado o fsx.CFG.
» Ajustando o SweetFX com ENB
Página 1 de 1
Permissões neste sub-fórum
Não podes responder a tópicos|
|
|